| JobTabs Job Search & Resume Builder 2013 | Submit feedback on this topic |
Glossary Item Box
| JobTabs Job Search & Resume Builder 2013 | Submit feedback on this topic |
For battle-hardened job seekers, the Qualifications Summary is an indispensable tool to win any resume reader over. If you find a dead-on Objective statement as too obvious, the Qualifications Summary is your next best bet on awakening an employer as to what you have to offer. A qualifications summary is a high level synopsis of what you have to offer. It is near the top of the resume and generally looks like this.

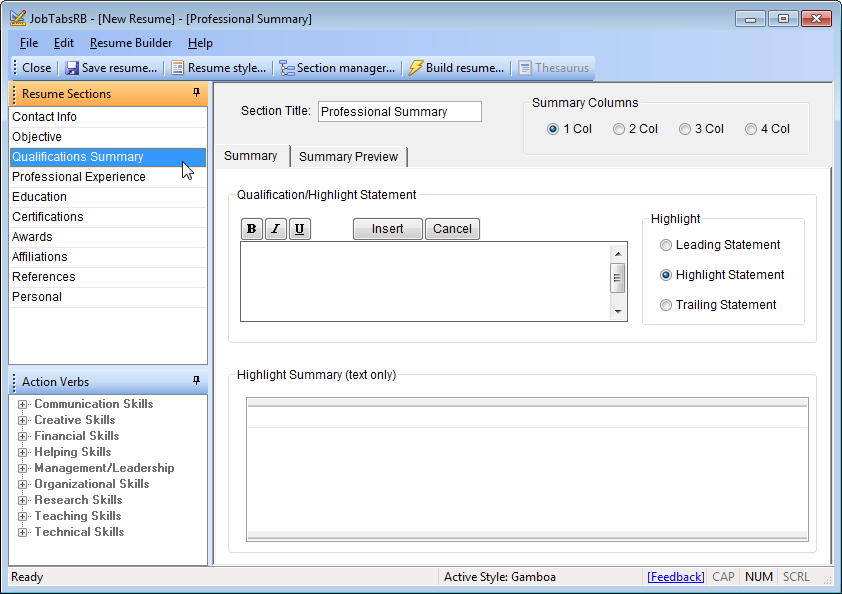
The styling above has one column. The JobTabs Resume Builder is able to build summaries with two, three and four columns. The JobTabs Resume Builder Qualifications Summary form is shown below.
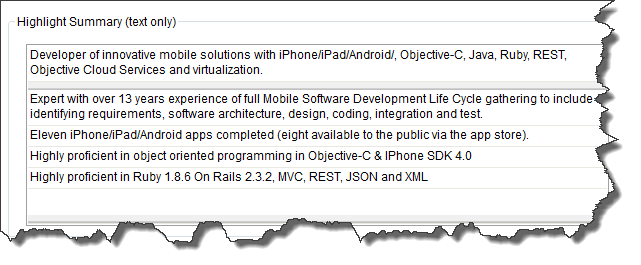
Qualifications Summary - In Practice
The heart of the Qualifications Summary is in the Qualification/Highlight Statement. To create your Qualifications Summary, type in a really compelling reason to hire you in the statement box and press Enter on your keyboard. (Alternatively, you can click the "Insert" button with your mouse.) Do this anywhere from three to seven times and you will have a completed Qualifications Summary.
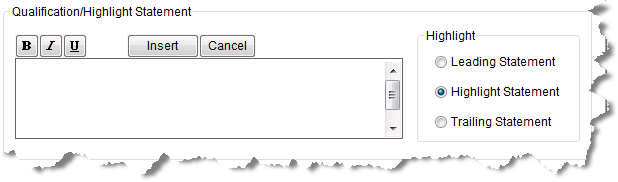
To have a really engaging Qualifications Summary, the JobTabs Resume Builder lets you jazz it up a little bit. Bold, Italics and Underline formatting can be applied selectively to the statement to bring out titles or emphasize keywords. Additionally, to the right of the statement box are radio buttons that allow you to break up your Qualifications Summary.
| Leading Statement |
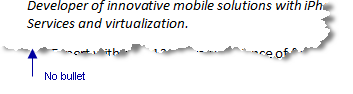
No bullets and is therefore not 'bulleted'. Always at the top of your qualifications summary.
In the sample above, the first statement is not bulleted and in italics.
|
| Highlight Statement |
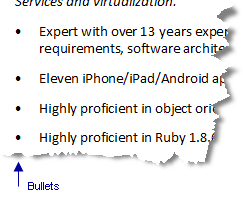
Always bulleted. Always below the leading statement and above the trailing statement.
The sample above has four highlight statements.
|
| Trailing Statement | Bottom of the Qualifications Summary and and never bulleted. The sample above does not have a trailing statement. |
Generally, if you want to have a Leading Statement or a Trailing Statement you only want to have one. Leading Statements serve as an all encompassing statement of who you are and what you do. They can also be a decent substitute for an Objective Statement. They can also serve as an introduction to the Highlight Statements.
Trailing Statements are as a "Bonus Feature" so to speak. You would use a Trailing Statement to say something outside of your mainline expertise, but still a very compelling selling point such as,
|
"Fluent in Spanish and French." |
"Single and able to travel 100%." | "Former Olympian in track and field. Uncommon dedication and discipline in pursuing goals." |
Highlight Statements are accumulated in the highlight summary.
In the sample, the Leading Statement is at the top. There is no Trailing Statement, but if there was it would be at the bottom of the box. All normal Highlight Statements are in the middle. It is important to note that no formatting is shown in the Highlight Summary even though all formatting is fully in place. If you were to click the Build Resume button, all bold, italic and underline formatting would be shown.
 |
Remember to Save your resume often. Just because a highlight is inserted into the Highlight Summary doesn't mean it is saved. Only the Save command on the menu or the toolbar will actually save your resume. |
To edit any statement, double-click the statement. It will be placed in the statement box. You can click the Update button or click Enter on your keyboard to save your changes. Click the Cancel button or press "Escape" on your keyboard to clear your changes.
To delete a statement, select it and hit the Delete key on the keyboard, or right click the statement and select "Delete" from the context menu.
Statements are in the Highlight Summary and on your resume in the order they are entered. To change the order of the statements, drag and drop them between each other.
Leading and Trailing statements cannot be dragged and dropped. Only the highlight statements can be dragged/dropped. In single column mode, there will be a red highlighter guiding the placement of the statement. While there are no red highlighter available when dragging in the multi-column mode, dragging/dropping still works.
| See Also |
Resume Builder: Multi-Column Summaries
© 2005 - 2012 by JobTabs, LLC. All rights reserved.